Auto Deploy: quick start guide
This is a step-by-step guide to deploying a project hosted on GitLab.com to Google Cloud, using Auto Deploy.
We made a minimal Ruby application to use as an example for this guide. It contains two files:
-
server.rb- our application. It will start an HTTP server on port 5000 and render “Hello, world!” -
Dockerfile- to build our app into a container image. It will use a ruby base image and runserver.rb
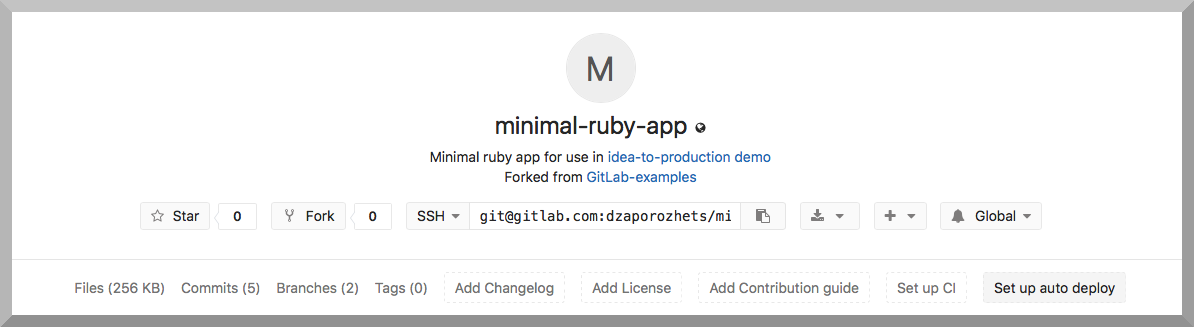
Fork sample project on GitLab.com
Let’s start by forking our sample application. Go to the project page and press the Fork button. Soon you should have a project under your namespace with the necessary files.
Setup your own cluster on Google Kubernetes Engine
If you do not already have a Google Cloud account, create one at https://console.cloud.google.com.
Visit the Kubernetes Engine tab and create a new cluster. You can change the name and leave the rest of the default settings. Once you have your cluster running, you need to connect to the cluster by following the Google interface.
Connect to Kubernetes cluster
You need to have the Google Cloud SDK installed. e.g. On OSX, install homebrew:
- Install Brew Caskroom:
brew install caskroom/cask/brew-cask - Install Google Cloud SDK:
brew cask install google-cloud-sdk - Add
kubectl:gcloud components install kubectl - Log in:
gcloud auth login
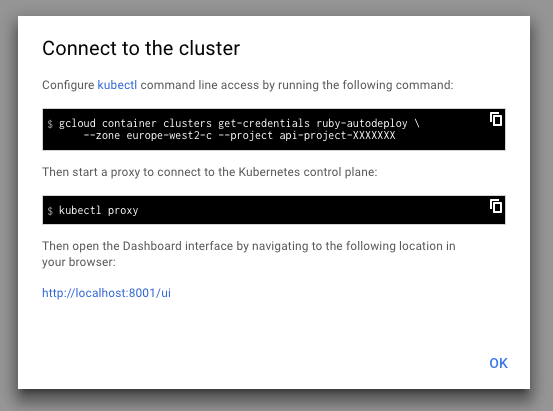
Now go back to the Google interface, find your cluster, and follow the instructions under Connect to the cluster and open the Kubernetes Dashboard. It will look something like gcloud container clusters get-credentials ruby-autodeploy \ --zone europe-west2-c --project api-project-XXXXXXX and then kubectl proxy.
Copy credentials to GitLab.com project
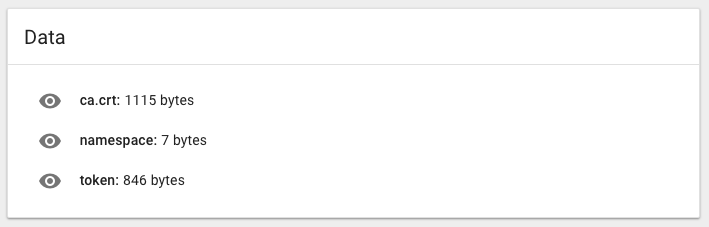
Once you have the Kubernetes Dashboard interface running, you should visit Secrets under the Config section. There you should find the settings we need for GitLab integration: ca.crt and token.
You need to copy-paste the ca.crt and token into your project on GitLab.com in the Kubernetes integration page under project Settings > Integrations > Project services > Kubernetes. Don't actually copy the namespace though. Each project should have a unique namespace, and by leaving it blank, GitLab will create one for you.
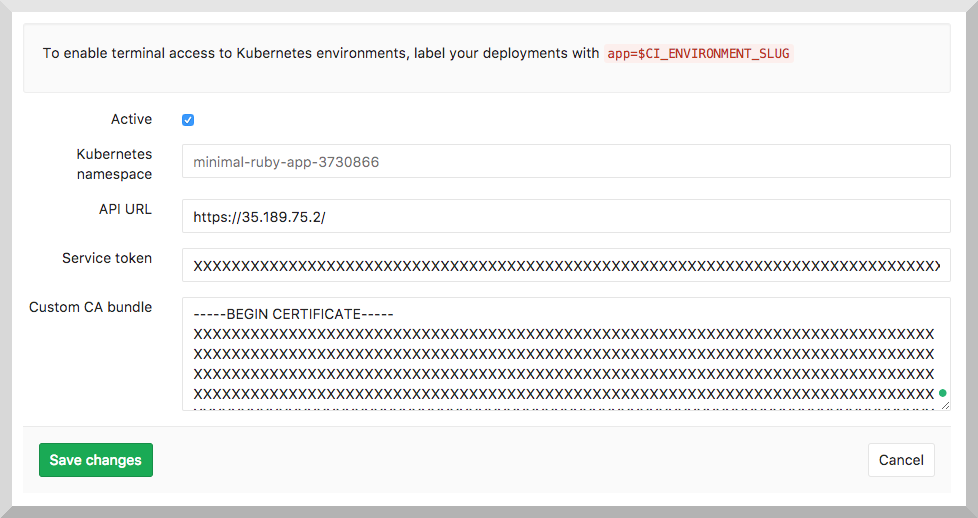
For API URL, you should use the Endpoint IP from your cluster page on Google Cloud Platform.
Expose the application to the internet
In order to be able to visit your application, you need to install an NGINX ingress controller and point your domain name to its external IP address.
Set up Ingress controller
You’ll need to make sure you have an ingress controller. If you don’t have one, do:
brew install kubernetes-helm
helm init
helm install --name ruby-app stable/nginx-ingress
This should create several services including ruby-app-nginx-ingress-controller. You can list your services by running kubectl get svc to confirm that.
Point DNS at Cluster IP
Find out the external IP address of the ruby-app-nginx-ingress-controller by running:
kubectl get svc ruby-app-nginx-ingress-controller -o jsonpath='{.status.loadBalancer.ingress[0].ip}'Use this IP address to configure your DNS. This part heavily depends on your preferences and domain provider. But in case you are not sure, just create an A record with a wildcard host like *.<your-domain> pointing to the external IP address you found above.
Use nslookup minimal-ruby-app-staging.<yourdomain> to confirm that domain is assigned to the cluster IP.
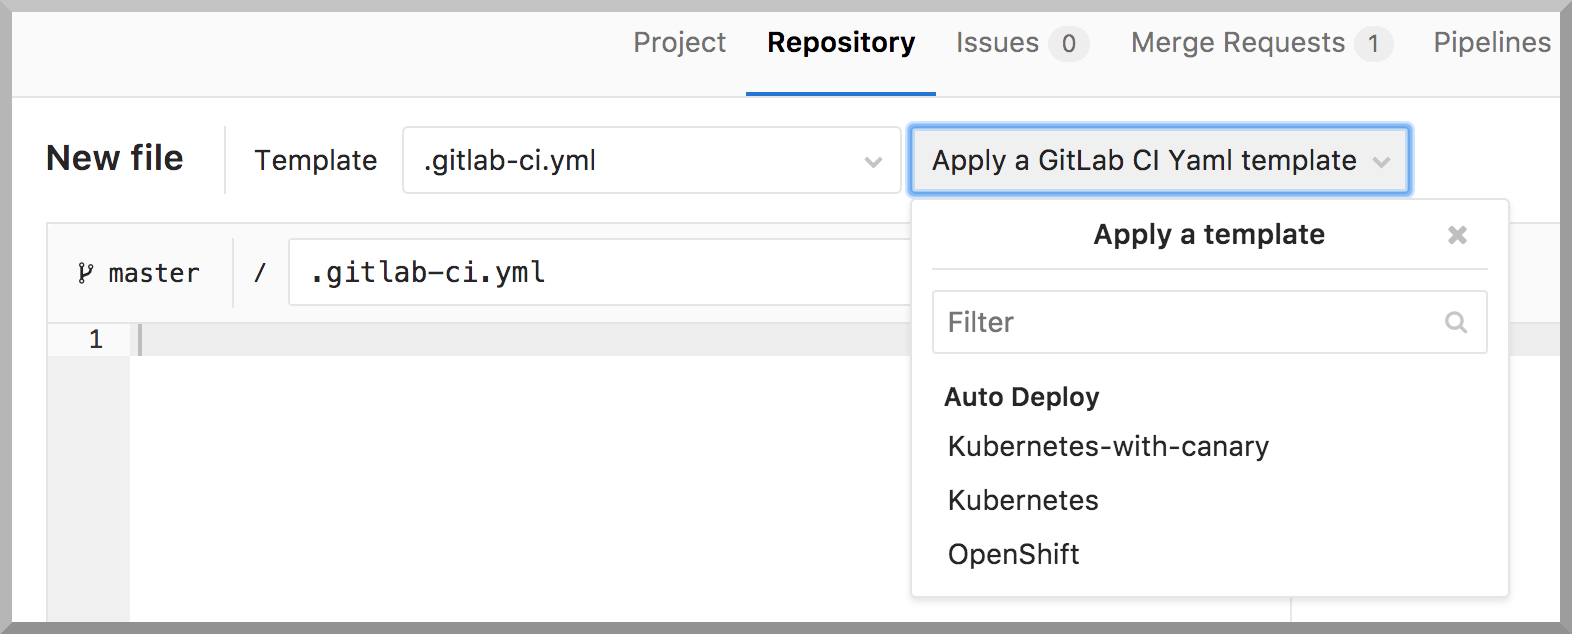
Setup Auto Deploy
Visit the home page of your GitLab.com project and press "Set up Auto Deploy" button.
You will be redirected to the "New file" page where you can apply one of the Auto Deploy templates. Select "Kubernetes" to apply the template, then in the file, replace domain.example.com with your domain name and make any other adjustments you need.
Change the target branch to master, and submit your changes. This should create
a new pipeline with several jobs. If you made only the domain name change, the
pipeline will have three jobs: build, staging, and production.
The build job will create a Docker image with your new change and push it to
the GitLab Container Registry. The staging job will deploy this image on your
cluster. Once the deploy job succeeds you should be able to see your application by
visiting the Kubernetes dashboard. Select the namespace of your project, which
will look like ruby-autodeploy-23, but with a unique ID for your project, and
your app will be listed as "staging" under the "Deployment" tab.
Once its ready - just visit http://minimal-ruby-app-staging.yourdomain.com to see “Hello, world!”